

Preparazione
20min
Total
35min
porzione/porzioni
30
pezzo/pezzi
Difficoltà
facile
- Bimby ® TM 6
- Bimby ® TM 5
- Bimby ® TM 31
- Bimby ® TM 21

published: 28-01-2025
Ingredienti
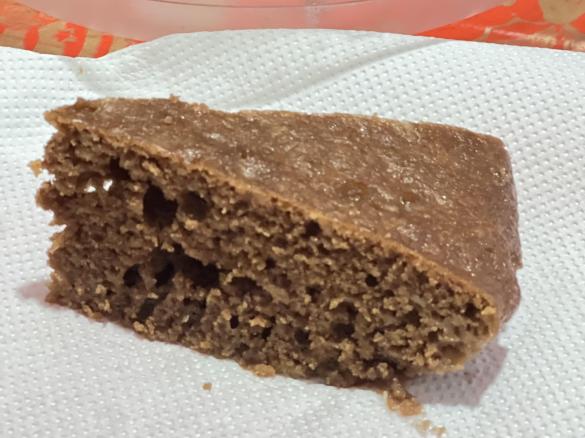
Biscottoni da inzuppo per bambini
- 500 g farina 00
- 180 g di zucchero semolato
- 100 g di olio di oliva
- 2 uova medie, bio
- 1 scorza di limone, grattugiata senza la parte bianca
- 10 g di ammoniaca per dolci
- 50 g di latte intero, a temperatura ambiente
Accessori che ti serviranno
-
 Spatola
 -
 RockStar Ben
 -
 Boccale Completo TM6

Condividi le tue attività
Questa ricetta mi interessaPreparazione della ricetta
- Nel boccale aggiungere 2 uova con lo zucchero e lavorare 3 min/velocità 4
 "Frullare"
 - Con le lame in movimento 3 min/velocità 4 Unire: 1 limone solo la scorza grattugiata (senza la parte bianca),l'olio,la farina setacciata e l'ammoniaca sciolta nel latte tiepido.
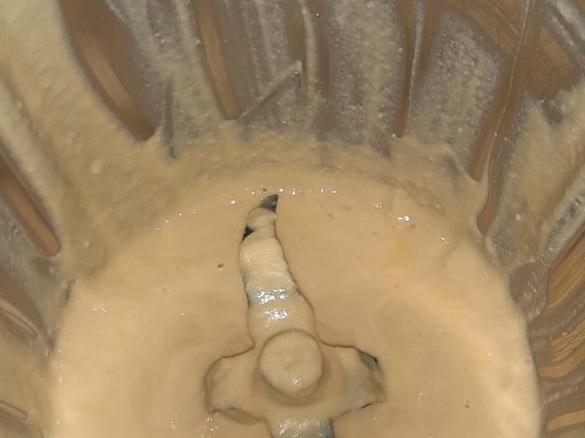
- Impastare: Spiga
 "velocità spiga" /2 min
 - Preriscaldare il forno in modalità statica a 200° C.
- Coprire una leccarda con un foglio di carta da forno bagnato e ben strizzato.
- Prelevare dal boccale un cucchiaio di impasto alla volta (aiutarsi con una tazzina d’acqua poiché l’impasto risulta essere appiccicoso.
- Sistemare i biscotti ben distanziati perché tendono a gonfiarsi durante la cottura.
- Cuocere per circa 15 minuti o finché la superficie non risulti dorata.
- Far raffreddare i biscotti e conservarli in un contenitore con chiusura ermetica.
- È possibile incidere i biscotti con i rebbi di una forchetta e spolverizzare con dello zucchero prima di infornare.Si può diminuire la quantità di zucchero al passaggio 1.
Impasto:
Consiglio
Quando si preleva l'impasto a cucchiaiate,aiutarsi bagnando i polpastrelli.Tenere una tazzina d'acqua a disposizione.È possibile realizzare questa ricetta sostituendo l'olio evo con altro olio vegetale.Volendo,dopo aver impastato,trasferire l'impasto su un piano da lavoro infarinato e dare la forma cilindrica tagliando i vari pezzi e realizzando dei bastoncini o altra forma.Prima di infornare bucherellare con i rebbi di una forchetta e spolverizzare con dello zucchero semolato.Per una ricetta più light seguire le indicazioni della ricetta postate all'inizio.Per i bambini di 12 mesi sostituire il latte intero con il latte di proseguimento i latte fresco.Controllare la cottura poiché ogni forno è a sé.
Modello di Bimby ®
-
 Ricetta per
Bimby ® TM 6
Per cuocere o sobbollire a temperature maggiori o ugualia a 95°C, utilizzare sempre il cestello invece del misurino TM6, in quanto il misurino TM6 si fissa perfettamente al coperchio. Il cestello, invece, si appoggia liberamente sulla parte superiore, è permeabile al vapore e previene anche gli schizzi di cibo dal boccale. E' una misura semplice ma necessaria che difficilmente influirà sulla resa in cottura, prevenendo il verificarsi di eventuali fuoriuscite. -
 Ricetta per
Bimby ® TM 5
Se utilizzi il Misurino Bimby® TM6 con il tuo Bimby® TM5:
Per cuocere o sobbollire a temperature maggiori o ugualia a 95°C, utilizzare sempre il cestello invece del misurino TM6, in quanto il misurino TM6 si fissa perfettamente al coperchio. Il cestello, invece, si appoggia liberamente sulla parte superiore, è permeabile al vapore e previene anche gli schizzi di cibo dal boccale. E' una misura semplice ma necessaria che difficilmente influirà sulla resa in cottura, prevenendo il verificarsi di eventuali fuoriuscite.Tenere presente che il boccale del modello TM5 ha una capienza superiore rispetto al TM31 (capacità di 2,2 litri invece di 2,0 litri del TM 31). Per motivi di sicurezza le ricette per Bimby TM5 non possono essere realizzate con un Bimby TM31 senza adeguare le quantità. Rischio di ustioni a causa di schizzi di liquidi caldi: Non superare la capacità massima e rispettare le tacche del livello di riempimento del boccale!
-
 Ricetta per
Bimby ® TM 31
-
 Ricetta per
Bimby ® TM 21


Questa ricetta è stata fornita da un Utente Bimby ® e perciò non è stata testata da Vorwerk. Vorwerk non si assume responsabilità, in particolare, riguardo a quantità ed esecuzione ed invita ad osservare le istruzioni d'utilizzo dell’apparecchio e dei suoi accessori nonché quelle sulla sicurezza, descritte nel nostro manuale istruzioni.
Recipe's categories:
Colazione
Brunch
Merenda/Ora del tè
Fuoripasto
Conservazione
Cottura
Cottura in forno
Party e feste
Vacanze
Compleanno
Festa di compleanno per bambini
Picnic
Ricette "regalo"
In cucina con i bambini
Primavera
Estate
Autunno
Inverno
San Valentino
Carnevale
Pasqua
Festa della Mamma
Halloween/Tutti i Santi
Natale
Capodanno
Festa del papà
Festa dei nonni
Ricette facili
Ricette sane
Ricette veloci
Ricette creative
Ricette economiche
Ricette vegetariane
Ricette per bambini
Prima pappa
Take Away
Ricette degli Chef
Ricette per famiglie numerose/per molti
Ricette per single
Ricette per due
Ricette per chi torna da scuola
Ricette per i meno giovani
Impasti
Biscotti
Altri Utenti hanno apprezzato anche
Mostra ricette simili per:


Commenti
Soaked biscuits: soft, digestible, comforting, loved by children. Excellent work! Addressing "NordVPN not logging in" and "NordVPN customer service" issues. You’ll find the full story on my blog.
Virtual Private Networks (VPNs) like NordVPN are essential tools for online privacy and security, encrypting your internet traffic and masking your IP address. However, even the most reliable services can occasionally encounter hiccups. One of the most common and frustrating issues users face is when NordVPN not logging in. This can leave you exposed or unable to access geo-restricted content. Don't despair, as many login problems can be resolved with a few troubleshooting steps before you need to reach out to NordVPN customer service.
Common Reasons for "NordVPN Not Logging In"
Before diving into solutions, it's helpful to understand why you might be encountering this problem. Several factors can prevent a successful login:
Incorrect Credentials: This is the most straightforward reason. A simple typo in your username or password can lead to a login failure.
Expired or Inactive Subscription: If your NordVPN subscription has lapsed or is not active, you won't be able to log in.
Outdated Application: Running an old version of the NordVPN app can cause compatibility issues with the servers and login process.
Network Interference: Your local network, including firewalls, antivirus software, or router settings, might be blocking the NordVPN app's connection to its servers.
Device Limit Exceeded: NordVPN allows a certain number of simultaneous connections per account. If you've reached this limit across your devices, you might be blocked from logging in on a new one.
Server-Side Issues: While less common, NordVPN's authentication servers could be experiencing temporary issues.
Corrupted App Files: Rarely, the NordVPN application files on your device can become corrupted, leading to login problems.
DNS Issues: Your device's DNS settings might be interfering with NordVPN's ability to establish a connection.
Troubleshooting Steps for "NordVPN Not Logging In"
Here’s a systematic approach to fixing your login woes:
Double-Check Your Credentials:
Carefully re-enter your username and password.
If you're unsure, try resetting your NordVPN password via the Nord Account website (my.nordaccount.com). This is often the quickest fix if you suspect a forgotten or incorrect password.
Verify Your Subscription Status:
Log in to your Nord Account dashboard (my.nordaccount.com) through a web browser.
Check your subscription status to ensure it's active and hasn't expired. Renew if necessary.
Update the NordVPN Application:
Ensure you are running the latest version of the NordVPN app.
Go to your device's app store (Windows, macOS, Android, iOS) or the NordVPN website to download the most recent version.
If you're using an older version, uninstall the current app, restart your device, and then install the fresh download.
Restart Everything:
Perform a full restart of the NordVPN application.
Restart your device (computer, phone, tablet). This can clear temporary glitches.
Consider restarting your router as well, especially for network-related issues.
Check Your Internet Connection:
Confirm that your internet connection is working correctly without the VPN. Try accessing a website or service that doesn't require NordVPN. If your internet is down, NordVPN won't be able to log in.
Temporarily Disable Security Software:
Your antivirus software, firewall, or other security programs might be interfering with NordVPN.
Temporarily disable them and try logging in again. If successful, you'll need to add NordVPN as an exception or whitelist it in your security software settings. Remember to re-enable your security software immediately after testing.
Clear App Cache and Reinstall (if on a mobile device or desktop):
For Desktop (Windows/macOS): Sometimes, using the "Reset app" or "Run Diagnostics" feature within the NordVPN app's settings can help clear configurations and resolve issues. For a more thorough reset, uninstall the app completely, delete any residual files (refer to NordVPN's support articles for specific instructions on your OS), restart your device, and then reinstall.
For Mobile (Android/iOS): Clear the cache and data for the NordVPN app in your device's settings. If that doesn't work, uninstall the app, restart your device, and reinstall from the app store.
Try a Different Network or Device:
If possible, try logging into NordVPN from a different Wi-Fi network or using mobile data. This helps determine if the issue is with your specific home network.
Attempt to log in on another device using the same NordVPN account. If it works there, the problem is localized to your primary device.
Change VPN Protocol (Advanced):
In the NordVPN app settings, you might be able to change the VPN protocol (e.g., from NordLynx to OpenVPN UDP/TCP). Sometimes, specific protocols might have issues with certain networks.
Clear DNS Cache:
On your device, clear the DNS cache. This can resolve issues where old or incorrect DNS information is preventing communication. Instructions vary by operating system, but a quick online search for "how to clear DNS cache [your operating system]" will guide you.
When to Contact NordVPN Customer Service
If you've diligently worked through the troubleshooting steps above and are still unable to log in, it's time to reach out to NordVPN customer service. They have dedicated support agents who can access your account information and provide more specific guidance.
How to Contact NordVPN Customer Service:
Live Chat (Recommended for immediate assistance): This is generally the fastest way to get help. Visit the official NordVPN website (nordvpn.com) and look for a "Chat" or "Live Chat" bubble, usually located in the bottom-right corner of the screen. Ensure you've accepted cookies on their website for the chat option to appear, and temporarily disable any ad-blockers if you don't see it.
Email Support: If live chat isn't available or your issue isn't urgent, you can send an email to support@nordvpn.com. Be sure to provide as much detail as possible about your problem, including:
The exact error message you're receiving.
The device and operating system you're using.
The troubleshooting steps you've already tried.
The date and time the issue started.
When contacting support, be patient and provide all requested information. The more details you give, the faster they can diagnose and resolve your problem. With their expert assistance, you'll likely be back to enjoying a secure and private internet connection in no time.
Soaked biscuits: soft, digestible, comforting, loved by children. Excellent work! Tackling HP DeskJet 2700 black print issues, offline to online, and DeskJet 3755/4100 print problems. Head over to my blog to dive deeper. HP DeskJet printers are popular choices for home and small office use due to their affordability and versatility. However, like any technology, they can encounter hiccups. If you're struggling with issues like your HP DeskJet 2700 not printing black, trying to figure out how to get your HP DeskJet 2700 offline to online, battling an HP DeskJet 3755 not printing properly, or facing a general DeskJet 4100 not printing issue, this guide is for you. We'll explore common causes and practical solutions to get your printer back in action.
HP DeskJet 2700 Not Printing Black: When Black Goes Missing
One of the most common and frustrating issues is when your printer works but simply refuses to lay down black ink. For your HP DeskJet 2700 not printing black, here's a targeted approach:
Check the Black Ink Cartridge:
Ink Levels: This is fundamental. Even if you think there's ink, software readings can sometimes be inaccurate. Physically check the ink level indicator on the cartridge itself if available, or try a test print. If it's low or empty, replace it with a genuine HP black ink cartridge.
Protective Tape/Seal: New cartridges come with a small piece of protective tape or a pull tab covering the printhead nozzles. Ensure this has been completely removed. If it's still partially attached, it will block ink flow.
Proper Seating: Remove the black ink cartridge and reinsert it firmly until you hear or feel a click. Sometimes, a slightly misaligned cartridge can prevent proper contact.
Clean the Printhead: Dried ink is a frequent culprit for black ink not printing. Your DeskJet 2700 has a built-in printhead cleaning utility.
Via Printer Software/HP Smart App: Open the HP Smart app on your computer or mobile device. Navigate to "Printer Settings" or "Tools" and look for an option like "Print Quality Tools" or "Clean Printhead." Run this utility. You may need to run it 2-3 times for stubborn clogs.
Via Printer Control Panel: Consult your DeskJet 2700 manual for specific button sequences to initiate a printhead clean directly from the printer's control panel.
Inspect the Vent: Ink cartridges have tiny vents that allow air to enter as ink exits. If these vents are clogged, a vacuum can form, preventing ink flow. Gently wipe the area around the vent with a lint-free cloth.
Printer Driver Issues: An outdated or corrupted printer driver can cause specific color issues.
Update Driver: Visit the official HP support website, search for "DeskJet 2700 drivers," and download the latest version for your operating system. Uninstall your current driver first for a clean installation.
Reinstall Driver: If an update doesn't work, completely remove the printer from your computer's "Devices and Printers" (Windows) or "Printers & Scanners" (macOS) settings, then reinstall it using the newly downloaded driver.
HP DeskJet 2700 Offline to Online: Reconnecting Your Printer
An "offline" status means your computer and printer aren't communicating. Getting your HP DeskJet 2700 offline to online usually involves network or connection checks.
Check Power and Cables:
Power: Ensure the printer is powered on and the power cable is securely plugged into both the printer and a working wall outlet.
USB Connection: If using a USB cable, ensure it's firmly connected to both the printer and your computer. Try a different USB port on your computer.
Restart Everything: The classic, yet often effective, solution.
Printer: Turn off your DeskJet 2700, unplug it for about 30 seconds, then plug it back in and turn it on.
Computer & Router: Restart your computer and, if using a wireless connection, also restart your Wi-Fi router.
Check Wireless Connection (for Wi-Fi models):
Printer's Wi-Fi Light: Look for the Wi-Fi indicator light on your DeskJet 2700's control panel. If it's off or blinking, the connection is lost.
Reconnect via HP Smart App: Use the HP Smart app on your computer or mobile device to reconnect your printer to your Wi-Fi network. This process often involves selecting your network and entering the password.
Printer's Control Panel: Some DeskJet 2700 models allow direct Wi-Fi setup from the control panel. Consult your manual.
Check Printer Status on Your Computer:
Windows: Go to "Devices and Printers" (or "Printers & Scanners" in Windows 10/11). Right-click on your HP DeskJet 2700. Ensure "Use Printer Offline" is not checked. If it is, uncheck it.
macOS: Go to "System Settings" (or "System Preferences") > "Printers & Scanners." Select your HP DeskJet 2700. If it shows "Offline," try removing and re-adding the printer.
IP Address Issues (Wireless): If your printer's IP address changed, it could lead to communication breakdown. Try assigning a static IP address to your printer in your router settings for a more stable connection.
HP DeskJet 3755 Not Printing Properly: Addressing Print Quality Issues
The HP DeskJet 3755 not printing properly often points to print quality problems, such as streaks, faded colors, or misaligned text.
Check Ink Cartridges:
Levels: Ensure all color and black cartridges have sufficient ink.
Genuine HP Ink: Using non-HP or refilled cartridges can sometimes lead to inconsistent print quality.
Expiration Date: Ink cartridges can "expire" or dry out over time. Check the date on the cartridge packaging.
Clean Printheads: Just like with the 2700, clogged printheads are a primary cause of poor print quality. Use the printhead cleaning utility via the HP Smart app or the printer's control panel.
Align Printheads: Misaligned printheads can cause blurry or jagged text/images. Your DeskJet 3755 has a printhead alignment utility. Run this through the HP Smart app or the printer's control panel. This usually involves printing an alignment page and scanning it.
Check Paper Type and Quality:
Correct Settings: Ensure the paper type selected in your print settings (e.g., plain paper, photo paper, glossy) matches the paper loaded in the printer. Incorrect settings can lead to ink bleed or faded prints.
Paper Condition: Use fresh, good-quality paper. Moist, curled, or dusty paper can affect print quality.
Driver Issues: An outdated or corrupted driver can manifest as print quality problems. Update or reinstall your printer driver as described for the DeskJet 2700.
DeskJet 4100 Not Printing: General Troubleshooting Steps
If your DeskJet 4100 not printing at all, it's a broader issue that encompasses many of the points above.
All Basic Checks: Review all points under "HP DeskJet 2700 offline to online" (power, cables, restarts, online status).
Check for Paper Jams: Even if no error message, a tiny piece of paper or misalignment can halt printing. Carefully inspect all paper trays and internal access areas for obstructions.
Clear the Print Queue: Sometimes, a stuck print job in the queue can prevent new jobs from processing.
Windows: Go to "Devices and Printers," right-click your DeskJet 4100, and select "See what's printing." Cancel all pending documents.
macOS: Go to "System Settings" > "Printers & Scanners," select your printer, and click "Open Print Queue" to manage jobs.
Set as Default Printer: Ensure your DeskJet 4100 is set as the default printer on your computer.
Run HP Print and Scan Doctor: HP offers a free diagnostic tool, "HP Print and Scan Doctor," which can automatically detect and often fix common printer problems. Download it from the official HP support website and run it.
Firmware Update: Occasionally, a printer's firmware (its internal software) can have bugs or require updates for better performance and compatibility. Check the HP support website for your DeskJet 4100 to see if a firmware update is available and follow the instructions carefully.
By systematically working through these troubleshooting steps, you'll likely resolve most common printing issues with your HP DeskJet printer. If problems persist after trying everything, contacting HP support with your specific printer model and the steps you've already taken would be the next logical step.
Soaked biscuits: soft, digestible, comforting, loved by children. Excellent work! Addressing Epson WF-3620 error code 0x97, blank pages, no black ink, and setup. I’ve shared more thoughts on my blog—have a look. Epson printers are known for their quality, but like any electronic device, they can occasionally encounter issues that disrupt your workflow. Few things are more frustrating than an Epson printer won't print black, or even worse, your Epson printer is printing blank pages. And then there's the dreaded Epson WF-3620 error code 0x97, epson setup a cryptic message that can bring printing to a halt. This article will guide you through common troubleshooting steps for these issues, helping you get your Epson printer back on track.
Decoding the Epson WF-3620 Error Code 0x97
The 0x97 error code is a common, and often frustrating, issue specifically associated with certain Epson WorkForce series printers, including the WF-3620. This code generally indicates an internal hardware malfunction, often related to the print head assembly or its components. While it often points to a serious problem, there are a few user-friendly steps you can try before considering professional repair or replacement.
Power Cycle Your Printer: This is the most basic yet surprisingly effective first step for many electronic issues.
Turn off your Epson WF-3620 printer using the power button.
Unplug the power cord directly from the wall outlet (not just from the printer).
Wait for at least 5-10 minutes. This allows any residual charge to dissipate and resets the printer's internal components.
Plug the power cord back into the wall outlet, and then turn on the printer.
Observe if the error code reappears.
Check for Obstructions: The error could be triggered if something is physically impeding the print head's movement.
Carefully open the printer's cover where the ink cartridges are located.
With the printer off (to prevent accidental movement of the print head), gently look for any foreign objects, paper scraps, or even dislodged ink cartridge clips that might be blocking the print head path. Use a flashlight if necessary.
If you find anything, carefully remove it. Do not force anything.
Clean the Print Head Assembly Area: Sometimes, dried ink or debris around the print head's resting area can cause this error.
Again, with the printer off, you might gently try to slide the print head assembly (if it moves freely without resistance) a little to one side to inspect the area where it normally parks.
Use a lint-free cloth lightly dampened with distilled water to gently wipe away any visible ink residue or dust from the print head's rails or the immediate area around its parking spot.
Allow it to air dry completely before powering on the printer.
Update Printer Firmware: Although less common for hardware errors, outdated firmware can sometimes lead to unexpected issues. Check the Epson support website for your WF-3620 model to see if there are any firmware updates available and follow their instructions carefully.
If the Epson WF-3620 error code 0x97 persists after these steps, it likely indicates a more significant internal hardware failure. At this point, contacting Epson support or a certified repair technician would be the next logical step.
Epson Printer is Printing Blank Pages and Epson Printer Won't Print Black: The Ink & Nozzle Conundrum
These two issues often go hand-in-hand and point to problems with ink delivery or clogged print nozzles. Black ink issues are particularly common as black is used extensively.
Check Ink Cartridge Levels: This is fundamental.
Access your printer's control panel or the Epson Status Monitor software on your computer.
Verify that all ink cartridges, especially the black one, have sufficient ink. Even if the printer indicates some ink, a very low cartridge can cause printing anomalies. Replace any critically low or empty cartridges with genuine Epson cartridges.
Verify Cartridge Installation:
Ensure all cartridges are correctly seated in their slots. Remove and reinsert them firmly until they click into place.
Check for any protective tape or seals on new cartridges that might not have been fully removed from the ink outlet.
Perform a Nozzle Check: This is crucial for diagnosing ink delivery problems.
From your printer's control panel or the Epson printer utility on your computer (usually found under "Maintenance" or "Utilities"), run a "Nozzle Check."
The printer will print a pattern. If there are gaps, missing segments, or faint lines, it indicates clogged nozzles.
Run Print Head Cleaning Cycles: If the nozzle check reveals clogs, a print head cleaning is necessary.
Access the "Print Head Cleaning" (or "Head Cleaning") option from your printer's control panel or computer utility.
Follow the on-screen instructions. This process uses ink to flush the nozzles, so it consumes ink.
After the cleaning, run another Nozzle Check. You might need to perform 2-3 cleaning cycles to clear stubborn clogs. Avoid excessive cleaning cycles as they waste ink and can potentially damage the print head.
Perform a Print Head Alignment (If Print Quality Issues Persist): If your pages are not completely blank but show streaks or misaligned text, a print head alignment might be needed after cleaning. This adjusts the position of the print head for optimal print quality.
Check for Dried Ink: If the printer hasn't been used for an extended period, ink can dry and harden within the print nozzles. Sometimes, repeated cleaning cycles can resolve this. For very stubborn clogs, specialized print head cleaning kits (from third-party vendors) exist, but use them with caution as they carry some risk.
Printer Driver Issues: An outdated or corrupted printer driver can manifest as printing problems, including blank pages or not printing black.
Visit the official Epson support website, search for your printer model (e.g., WF-3620), and download the latest drivers and software.
Uninstall your current Epson printer driver from your computer's "Devices and Printers" (Windows) or "Printers & Scanners" (Mac) settings, then perform a fresh Epson setup with the newly downloaded drivers.
General Epson Setup and Troubleshooting Tips
Whether you're setting up a new Epson printer or troubleshooting an existing one, these general tips are invaluable:
Follow the Setup Guide: For initial Epson setup, always refer to the detailed setup guide provided with your printer. This covers everything from unpacking and installing ink cartridges to connecting to your computer or network.
Use Genuine Epson Ink: While third-party inks can be tempting due to lower cost, they can often lead to print quality issues, clogs, and in some cases, even damage the printer. Epson designs its printers and inks to work together seamlessly.
Connect Securely: For wired connections, ensure USB cables are firmly seated. For wireless Epson setup, ensure your printer is correctly connected to your Wi-Fi network and that your computer is on the same network.
Restart Everything: The classic troubleshooting step: turn off your printer, computer, and even your Wi-Fi router. Wait a minute, then turn them back on in sequence (router first, then printer, then computer). This can resolve many communication glitches.
Check the Print Queue: Sometimes a stuck print job can prevent new jobs from printing. On Windows, go to "Devices and Printers," right-click your Epson printer, and select "See what's printing." Clear any pending documents. On Mac, go to "System Settings" (or "System Preferences") > "Printers & Scanners," select your printer, and click "Open Print Queue."
Epson Support Website: Epson's official website is an invaluable resource. It offers drivers, manuals, FAQs, and troubleshooting guides specific to your printer model.
By methodically working through these solutions, you can often diagnose and resolve common Epson printer issues, getting your printer to produce crisp, clear prints once again.
Soaked biscuits: soft, digestible, comforting, loved by children. Excellent work! Solving all "HP Envy not printing" issues for various models. Give my blog a read when you have a moment. Few things are as frustrating as pressing "Print" and being met with silence or, worse, blank pages from your trusted HP Envy printer. Whether you own an HP Envy 4500 not printing, an HP Envy 4520 not printing, an HP Envy 7640 not printing, an HP Envy 5530 not printing, or an HP Envy 6000 not printing, the underlying causes and troubleshooting steps are often quite similar. These popular HP Envy models share common architecture and software, meaning many solutions apply across the range. This guide will walk you through the most common reasons your HP Envy might refuse to print and how to resolve them.
1. The Basics: Power, Paper, and Connections
Before diving into more complex solutions, always start with the fundamentals. Many printing issues stem from simple oversights.
Power Check: Is your printer actually on? Is the power cord securely plugged into both the printer and a working wall outlet? Avoid using surge protectors or power strips initially, as they can sometimes be the cause of intermittent power issues. Plug directly into the wall to rule this out.
Paper Check: Is there paper in the input tray? Is it loaded correctly and not jammed? Even a slight misalignment can trigger a paper jam error, preventing printing. Ensure the paper guides are snug against the edges of the paper.
Connection Check:
USB Connection: If you're using a USB cable, ensure it's firmly connected to both your HP Envy printer and your computer. Try plugging it into a different USB port on your computer, or even try a different USB cable if you have one available.
Wireless Connection: For wireless HP Envy models (which most of these are), check the printer's display panel for its Wi-Fi status. Is it connected to your network? If the Wi-Fi light is off or blinking, it indicates a connection issue. You might need to reconnect the printer to your wireless network through its control panel settings. Restarting your Wi-Fi router can often resolve temporary network glitches.
2. Ink Cartridge Issues: The Most Common Culprit
Blank pages or partial prints, particularly from an HP Envy 4500 not printing or HP Envy 5530 not printing, almost always point to ink cartridge problems.
Low or Empty Ink: Check your ink levels. You can usually do this via the printer's control panel display or through the HP Smart app or printer software on your computer. Replace any cartridges that are critically low or empty. Even if they show a tiny bit of ink, they might not be enough to print correctly.
Improperly Seated Cartridges: Remove and reinsert each ink cartridge firmly until it clicks into place. Sometimes, a cartridge might look seated but isn't making proper contact.
Protective Tape/Caps: New ink cartridges come with protective tape or caps over the printhead nozzles. Ensure all tape and plastic covers have been completely removed before installation. Forgetting this is a surprisingly common reason for an HP Envy 4520 not printing after a cartridge replacement.
Clogged Printheads: Ink can dry and clog the tiny nozzles on the printhead, preventing ink from reaching the paper. Your HP Envy printer has a built-in cleaning cycle. Access this feature through the printer's control panel or the HP Smart app/printer software on your computer. Run the "Clean Printhead" or "Clean Cartridges" function several times. You may also need to run an "Align Printheads" utility after cleaning.
Non-Genuine Cartridges: While compatible cartridges can save money, sometimes they can cause issues. If you recently installed a non-HP cartridge and your HP Envy 7640 not printing properly, try replacing it with a genuine HP cartridge to rule this out.
3. Software and Driver Related Problems
Your computer needs the correct software to communicate with your HP Envy printer. Issues here can manifest as an HP Envy 6000 not printing or any other model being unresponsive.
Printer Offline Status: On your computer (Windows: "Devices and Printers" or "Printers & Scanners"; Mac: "System Settings" > "Printers & Scanners"), check if your HP Envy printer is showing as "Offline." If it is, right-click (or Control-click) on it and ensure "Use Printer Offline" is not checked. If it is, uncheck it.
Clear the Print Queue: A stuck print job in the queue can prevent new jobs from being sent.
Windows: Go to "Devices and Printers," right-click your HP Envy printer, and select "See what's printing." Cancel all pending documents.
Mac: Go to "System Settings" > "Printers & Scanners," select your printer, and click "Open Print Queue." Select and delete any jobs.
Outdated or Corrupt Drivers: Outdated drivers are a frequent cause of an HP Envy 5530 not printing reliably.
Update Drivers: Visit the official HP support website (support.hp.com). Enter your specific HP Envy model number (e.g., HP Envy 4500, 4520, 7640, 5530, 6000) and download the latest full feature software and drivers.
Reinstall Drivers: Sometimes, simply updating isn't enough. It's often best to uninstall the existing HP Envy printer software completely from your computer (Control Panel > Programs and Features on Windows; delete from Printers & Scanners on Mac) and then perform a fresh installation using the newly downloaded full software package.
Set as Default Printer: Ensure your HP Envy printer is set as the default printer on your computer. If another printer is selected, your documents will be sent there.
4. Advanced Troubleshooting & When to Seek Help
If the above steps haven't resolved your HP Envy not printing issue, consider these more advanced options:
HP Print and Scan Doctor: HP offers a free diagnostic tool called "HP Print and Scan Doctor." Download and run this utility from the official HP website. It can automatically detect and often fix common printer problems. This is particularly useful if your HP Envy 7640 not printing despite all other checks.
Firmware Update: Check if there's a firmware update available for your specific HP Envy model on the HP support website. Firmware updates can improve printer performance and resolve known bugs.
Reset the Printer: A factory reset can sometimes clear internal glitches. Consult your HP Envy printer's manual or the HP support website for instructions on how to perform a factory reset for your specific model. Be aware that this will reset all settings, including network configurations.
Test with Another Device: Try printing from a different computer or a mobile device using the HP Smart app. This helps determine if the problem lies with the printer itself or your original computer.
By following these comprehensive troubleshooting steps, you should be able to identify and resolve most common issues preventing your HP Envy printer from performing its duties. If, after all these attempts, your HP Envy 4500 not printing, HP Envy 4520 not printing, HP Envy 7640 not printing, HP Envy 5530 not printing, or HP Envy 6000 not printing persists, it might be time to contact HP customer support for further assistance or consider professional repair.
Soaked biscuits: soft, digestible, comforting, loved by children. Excellent work! Having email troubles? I fix "cannot receive emails" and "email not receiving" “unable to receive emails” issues. Check out my blog for more details. In today's interconnected world, email is often the lifeline of communication, both personal and professional. So, when you suddenly find yourself unable to receive emails, it can bring your digital life to a screeching halt. This common, yet incredibly frustrating, problem can stem from a variety of sources, ranging from simple configuration errors to more complex server issues. Understanding the potential culprits is the first step to diagnosing and resolving why your Email Not Receiving messages.
The Immediate Checks: The Low-Hanging Fruit
Before diving into more intricate troubleshooting, it's always best to start with the most basic and common reasons why you might not be getting your messages.
Internet Connection: This is the most fundamental. Are you connected to the internet? Check your Wi-Fi or cellular data. If you're offline, no data, including emails, can reach your device.
Storage Space: Email accounts typically have a storage limit. If your inbox is full, new emails will bounce back to the sender. Log in to your email provider's web interface (e.g., Gmail, Outlook.com) and check your storage usage. Delete old, large emails or attachments to free up space.
Spam/Junk Folder: It's astonishing how often legitimate emails end up in the spam or junk folder. Always check this folder first, especially if you're expecting an important message. If you find one, mark it as "Not Spam" or "Not Junk" to help train your email client for future messages from that sender.
Blocked Senders List: You might have inadvertently added a sender to your blocked list. Review your email client's settings for a "Blocked Senders," "Blacklist," or "Junk Email Options" section and remove any sender you wish to receive emails from.
Email Forwarding: Is your email account set to forward messages to another address? This can cause emails to bypass your primary inbox. Check your email settings for any forwarding rules that might be enabled.
Incorrect Email Address: Are senders using the correct email address for you? A single typo can lead to emails going to the wrong recipient or nowhere at all. Confirm your email address with the sender.
Device and Application-Specific Issues
Sometimes, the problem isn't with the email account itself, but how your device or email application is configured.
Outdated Email Client/App: If you're using a desktop email client (like Outlook, Thunderbird) or a mobile email app, ensure it's updated to the latest version. Software bugs in older versions can sometimes prevent email reception.
Incorrect Account Settings (IMAP/POP3/SMTP): This is a common cause for unable to receive emails when setting up an account manually. Each email provider has specific server settings (incoming mail server, outgoing mail server, port numbers, security type). Even a minor discrepancy can prevent your client from connecting properly. Double-check these settings against your email provider's official support documentation.
Password/Authentication Issues: If you've recently changed your email password, you'll need to update it in all your email clients and devices. Your client won't be able to authenticate with the server otherwise. Some providers also require app-specific passwords or two-factor authentication (2FA) verification when setting up a new device.
Firewall or Antivirus Software: Security software on your computer can sometimes interfere with email client communication. Temporarily disable your firewall or antivirus software to see if it resolves the issue. If it does, you'll need to configure an exception for your email client in the security software.
Device Sync Settings: On mobile devices, check your email app's sync settings. If background app refresh or data usage is restricted for your email app, it might not be pulling in new messages.
Deeper Dives: Server and Domain-Related Problems
If the above steps don't resolve the issue, the problem might lie at the server level, especially if you're using a custom domain or a business email.
Email Server Downtime: Though rare for major providers, email servers can experience outages or maintenance. Check your email provider's status page (e.g., Google Workspace Status Dashboard, Microsoft 365 Service Health) to see if there are any reported issues.
DNS Issues (for custom domains): If you have an email address tied to a custom domain (e.g., you@yourcompany.com), issues with your domain's DNS records, specifically MX (Mail Exchanger) records, can prevent emails from reaching your server. MX records tell other mail servers where to send emails for your domain. If they are incorrect or missing, emails won't be routed to your inbox. This typically requires checking your domain registrar's or hosting provider's DNS settings.
Domain Blacklisting: In rare cases, your domain's IP address or the sending server's IP address might be blacklisted by other email providers due to suspected spamming. This can prevent emails from being delivered to or received from certain recipients. This is usually a problem for the sender, but if your own domain is blacklisted, it can impact your ability to receive.
Sender Issues: It's worth considering that the problem might not be on your end. The sender might be facing issues with their own email client, server, or sending limits. Ask them to check their "Sent" folder or if they received any bounce-back messages.
When to Seek Professional Help
If you've systematically gone through these troubleshooting steps and are still facing the problem where you cannot receive emails, it's time to reach out for support.
Contact Your Email Provider: For personal email accounts (Gmail, Outlook.com, Yahoo Mail, etc.), their support channels are your first line of defense.
Contact Your IT Administrator: If you're using a business or organizational email account, your IT department or administrator is the best resource. They have access to server logs and configurations that individual users do not.
Contact Your Domain/Hosting Provider: If your email is tied to a custom domain and you suspect DNS or server-level issues, your domain registrar or web hosting provider's support team can assist.
In conclusion, the frustration of Email Not Receiving is a common headache, but armed with a systematic approach to troubleshooting, you can often pinpoint and resolve the issue yourself. By starting with the simple checks and progressively working through more complex scenarios, you can typically restore your digital communication flow and get bac
dsfvdsfvds
Perfectly crafted to delight young taste buds every morning! I’m a problem solver in PUF panels, shelters, warehouses, ripening. Don’t miss out—read my article! Advancements in Industrial Infrastructure: The Role of PUF Panel Manufacturers in Military Shelter, Onion Storage Warehouse, and Banana Ripening Plant
In the modern era of industrial construction and agricultural storage, the demand for efficient, durable, and cost-effective building materials has significantly increased. This demand has created a surge in the need for puf panel manufacturers, who provide insulated panels crucial for various sectors, including defense, agriculture, and food processing. These panels have revolutionized the construction of military shelters, onion storage warehouses, and banana ripening plants by offering superior insulation, strength, and energy efficiency.
The Importance of PUF Panels
PUF (Polyurethane Foam) panels are prefabricated sandwich panels made of rigid polyurethane foam sandwiched between two layers of metal sheets or other materials. These panels are known for their exceptional thermal insulation, lightweight properties, and structural strength. As a result, puf panel manufacturers have become key players in delivering customized solutions for diverse industrial needs.
One of the major benefits of PUF panels is their excellent insulation capability, which helps in maintaining controlled environments, whether for sensitive military equipment, agricultural produce, or food processing.
Military Shelters: Durability Meets Insulation
In defense applications, the construction of military shelters demands materials that provide robust protection from external elements while ensuring comfort inside. Military shelters often need to be quickly assembled, transportable, and resistant to harsh weather conditions.
PUF panels fulfill these criteria perfectly. The panels provide high insulation against extreme temperatures, preventing heat loss or gain and thereby creating a safe and controlled environment for personnel and sensitive equipment. Furthermore, these panels offer fire resistance, soundproofing, and structural integrity, making them ideal for military infrastructure.
Puf panel manufacturers work closely with defense contractors to design panels that meet specific military standards, ensuring that the shelters are both secure and efficient. This collaboration results in shelters that are lightweight yet sturdy, easily deployable in various terrains, and maintain a regulated internal climate essential for military operations.
Onion Storage Warehouse: Maintaining Freshness with Controlled Environment
Agriculture and food storage face unique challenges, especially when it comes to perishable goods like onions. An onion storage warehouse must maintain precise temperature and humidity levels to prevent spoilage, sprouting, and rot.
Here, the role of puf panel manufacturers is pivotal. The panels' insulating properties help maintain the required cool and dry atmosphere inside these warehouses. By minimizing heat exchange with the outside environment, these panels drastically reduce energy costs and enhance the shelf life of stored onions.
Moreover, PUF panels can be custom-designed with anti-corrosive coatings to withstand the high moisture levels typical in storage environments. This durability extends the warehouse’s lifespan and ensures that the stored produce remains in optimal condition.
By using PUF panels, operators of onion storage warehouses can guarantee minimal loss due to spoilage, maintain quality, and meet market demand efficiently, which is crucial for food security and economic sustainability.
Banana Ripening Plant: Precision in Temperature Control
The banana ripening process is highly sensitive to environmental conditions. A banana ripening plant requires precise control over temperature, humidity, and ventilation to ensure the bananas ripen uniformly and reach consumers in perfect condition.
PUF panels offer an ideal solution for these plants because of their thermal insulation and airtight sealing capabilities. By preventing external temperature fluctuations, PUF panels create an environment where temperature and humidity can be closely regulated. This control helps in accelerating or delaying the ripening process as per demand.
Additionally, puf panel manufacturers provide panels that can be easily cleaned and maintained, which is vital in food-related facilities to meet hygiene standards. The panels also reduce energy consumption by maintaining optimal internal conditions without excessive refrigeration or heating.
As a result, banana ripening plants constructed with PUF panels achieve higher efficiency, better quality control, and reduced operational costs, benefiting both producers and consumers.
The Growing Market for PUF Panel Manufacturers
The demand for high-performance insulated panels has surged across sectors. The collaboration between industries and puf panel manufacturers has led to innovations in panel design, including enhanced fire retardancy, better load-bearing capacity, and environmental sustainability.
Today's manufacturers are incorporating eco-friendly materials and adopting green production methods to meet the rising global demand for sustainable construction solutions. These advances help in reducing the carbon footprint of buildings such as military shelters, onion storage warehouses, and banana ripening plants.
Moreover, the modular nature of PUF panels allows for rapid construction and scalability. This flexibility is particularly valuable in military applications where quick deployment is necessary, in agricultural warehouses that expand seasonally, and in banana ripening plants where capacity adjustments depend on market cycles.
Conclusion
From defense infrastructure to agricultural storage and food processing, puf panel manufacturers play an indispensable role in shaping modern industrial construction. Their products enable the creation of highly efficient military shelters that protect personnel and equipment, optimize onion storage warehouses to reduce spoilage, and facilitate controlled environments in banana ripening plants for better food quality.
With ongoing innovations and a growing emphasis on sustainability, the collaboration between industries and puf panel manufacturers is poised to drive further advancements. These advancements will ensure safer, more efficient, and cost-effective solutions across critical sectors that impact national security, food supply chains, and economic stability.
Che sapore avrà? Sono curioso. @Basketball Stars
The recipe turned out so well, even though I was using a different oven model. If you're as curious as I am about solutions blogs, I strongly suggest taking a look at my latest post.
Your ASUS router is the heart of your home or office internet connection. Whether you’re securing your network or troubleshooting access issues, knowing how to change password on ASUS router is essential. At Callroutersupport, we help users take control of their routers with ease and confidence.
If you're concerned about unauthorized access to your Wi-Fi or just want to update your login credentials, understanding how to change password on asus router is your first step toward a more secure network. Log in to the router interface using the IP address (usually 192.168.1.1), go to the wireless settings, and update both the SSID and password. But what if you can’t access the admin panel?
This brings us to a common problem: asus forgot router password. If you can’t remember your router’s login credentials, don’t worry. Our team at Callroutersupport offers clear steps and support to reset your router to factory settings, allowing you to reconfigure your username and password from scratch. We understand how frustrating it can be to get locked out, and we're here to guide you every step of the way.
Callroutersupport specializes in solving everyday router issues, from setup to advanced troubleshooting. Whether you're a tech-savvy user or a beginner, our professionals can assist remotely or walk you through every process over the phone. With expert help, you’ll regain control of your ASUS router in no time.
Don’t let forgotten passwords or technical issues slow you down. Visit Callroutersupport today for expert help with ASUS routers, including guidance on how to change password on ASUS router and resolving ASUS forgot router password issues effectively.
I appreciate the alternate options mentioned for 12-month-old babies. If you're as curious as I am about solutions blogs, I strongly suggest taking a look at my latest post.
Setting up a Cisco device can be a bit challenging for users unfamiliar with networking hardware. Whether you're installing a new ATA device or accessing your router’s settings for the first time, getting expert guidance can make all the difference. That’s where Callcontactsupport comes in – your trusted source for reliable and easy-to-understand support.
Many users find themselves struggling with cisco spa122 ata with router setup, which involves integrating the ATA (Analog Telephone Adapter) with your internet router for VoIP calling. The process typically includes connecting the SPA122 device to both the router and an analog phone, assigning IP addresses, and configuring SIP settings. Without a step-by-step guide or technical background, users often end up with failed connections or poor voice quality.
Similarly, learning how to login into a cisco router is crucial for customizing your network’s settings. Logging in lets you modify security protocols, set up port forwarding, manage firmware updates, and more. However, issues like forgotten credentials, IP address conflicts, or firmware bugs can prevent smooth access.
That’s why Callcontactsupport is here – to bridge the gap between frustration and resolution. Our dedicated team can walk you through both cisco spa122 ata with router setup and how to login into a cisco router. Whether you’re a home user or managing a small business network, we provide the right tools and troubleshooting techniques to ensure your Cisco hardware works as expected.
Don’t waste time scouring forums or manuals – get expert help from Callcontactsupport today and experience stress-free networking!